Step-by-step guide to create a “Seven” sub-theme for Drupal 8
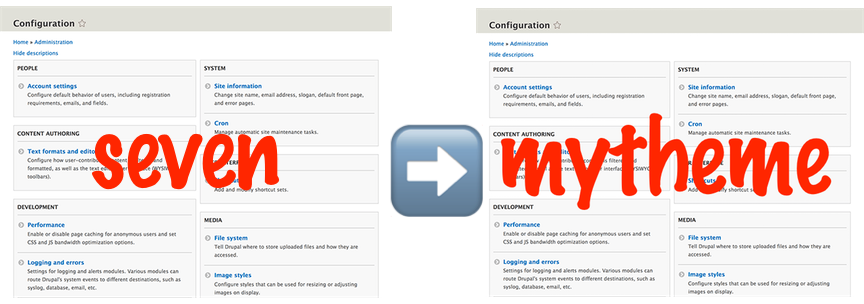
Working in Drupal means always being open to learn new things. Nothing stays the same for long and there’s so much to pick up that you may not have before encountered.
Today, that came in the form of an administration theme that went awry. (Enough talk: give me the tutorial.)
I’ve been trying to sub-class “Seven,” which is Drupal 8’s default admin theme, and which is, itself, a sub-theme of “Classy.” This had not been going well for me. While I was able to create and enable the theme, it certainly didn’t quite work the way it was supposed to.
For example, when I followed (to the letter) the example by Si Hobbs on the Lil Engine “Subtheme your admin theme” post, I noticed that the wrong blocks were being placed at the top of the block layout.
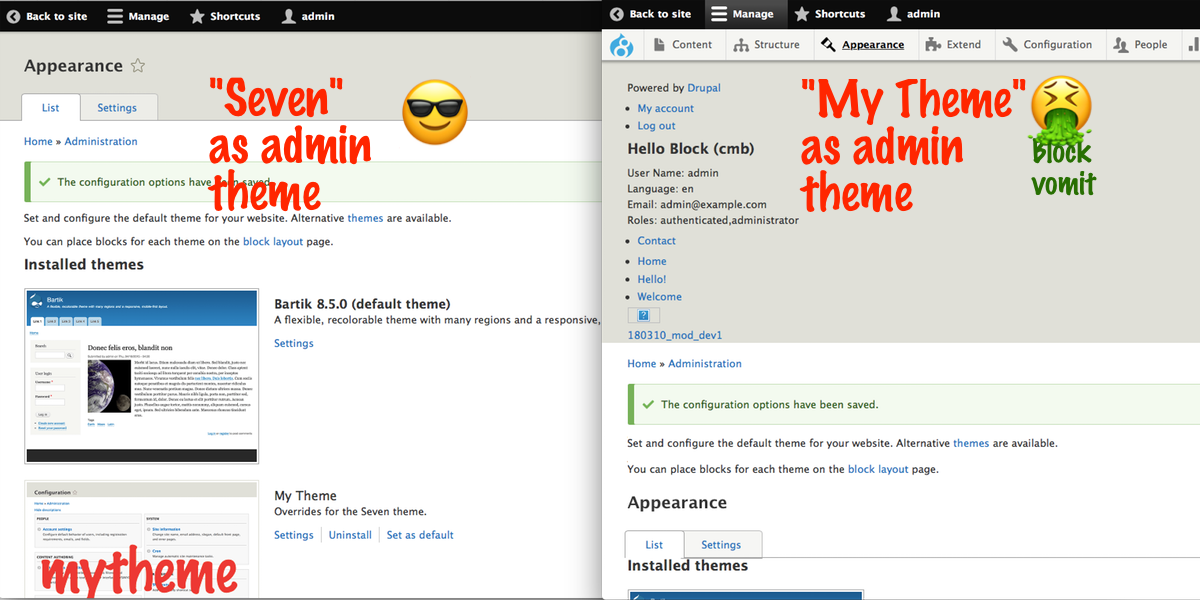
Checking admin/structure/block showed that not only are blocks placed in the wrong spot, but there are also blocks missing.
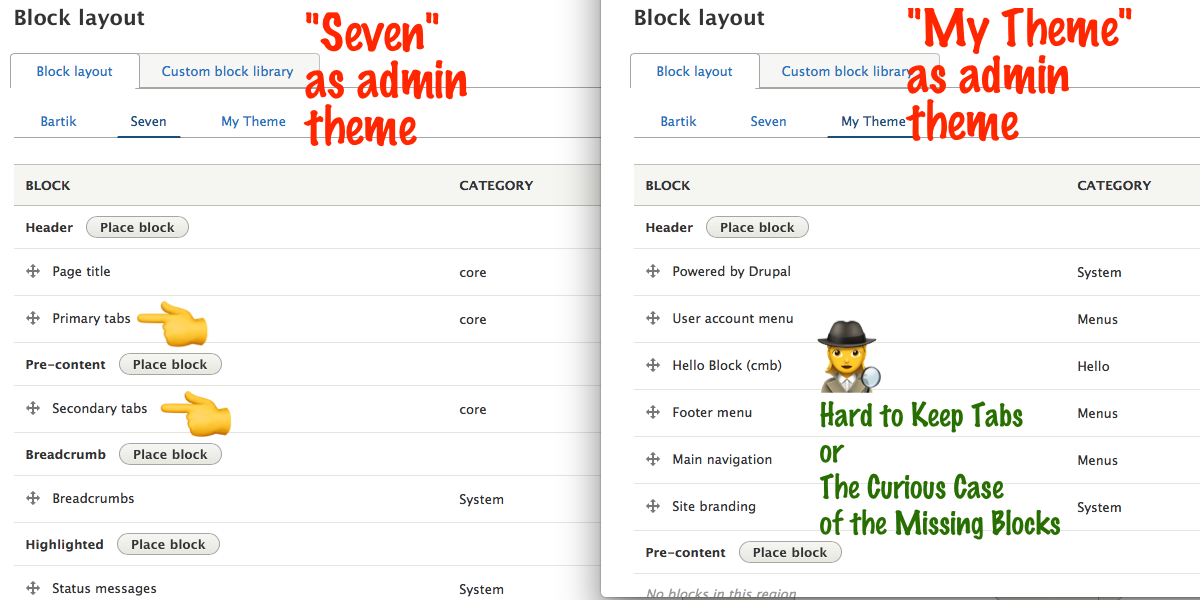
The funniest thing is how hard it was to find good examples of people trying to sub-theme “Seven.”
Then, while I’m working on this post, I search “drupal 8 place block on theme install” and get this as the top result:
How to Assign Blocks to Particular Regions on Theme
I’m trying to do what Vadim is doing: create a sub-theme of Seven and have the blocks placed somewhere on install.
But there is not one, no, not one single example of someone walking through in any detail the steps completely. So why not show what I did and what worked and didn’t so that if anyone else ever finds this post they will be able to do exactly what I did and get the same result?
Acknowledgements
Despite the issues I encountered, I am extremely grateful for the work that was done and shared by Si Hobbs for Lil Engine and the post and subsequent conversation between vadim.jin and Jeff Burnz. They laid the necessary groundwork to get this working for me. The last mile divide was bridged with the help of my coworkers, nixter and Kikki Beltz.
How to Sub-theme Drupal 8’s Seven Administrative Theme
Assumptions
You have some familiarity with Drupal 8, though not necessarily that much. Perhaps you are a site builder or a site developer from Drupal 7, who is trying to get familiar with Drupal 8. In any case, you know how to
- install a Drupal 8 site
- access the Drupal 8 file system
- use the Drupal 8 admin GUI
Step 0 – Have a Drupal 8 site
Start with an installed Drupal 8 site.
(I know this assumes a lot, but if you use Acquia Dev Desktop, it gets easier than going the MAMP route.)
I used my local site on Acquia Dev Desktop.
Step 1 – Exporting configuration files
Export configurations by going here:
http://yoursitename/admin/config/development/configuration/full/export
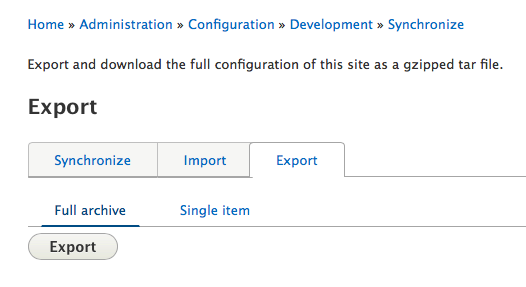
Run the export
Step 2 – Change the necessary exported files
Pull the files mentioned here:
Drupal 8 Admin Primary Tabs Completely Disappeared
block.block.seven_local_actions.yml
block.block.seven_page_title.yml
block.block.seven_primary_local_tasks.yml
block.block.seven_secondary_local_tasks.yml
Change the filenames like so:
block.block.mytheme_local_actions.yml
block.block.mytheme_page_title.yml
block.block.mytheme_primary_local_tasks.yml
block.block.mytheme_secondary_local_tasks.yml
Then, go into each of the YAML files, replacing any mention of “seven” with “mytheme” and removing UUID and config hash:
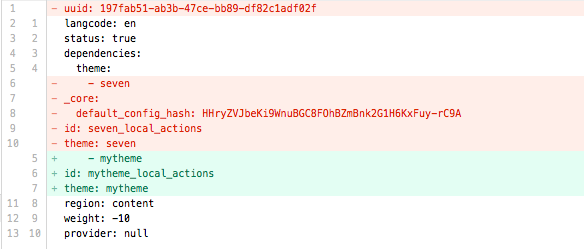
Make sure to do that to each of the four YAML files.
Step 3 – Create the file structure for the theme
This directory goes inside the site root folder. In Acquia Dev Desktop, it’s where you end up when clicking the link next to “Local code”. As you can see, my site is creatively called “drupal–8.5.0,” which was the default name given by Acquia Dev Desktop.
yoursitename/themes/custom/mytheme
You will need to create the “custom” folder first.
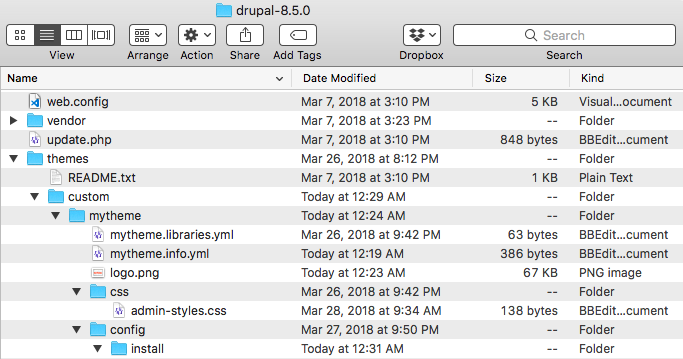
In the theme folders, make a set of files as below (linked), which is basically my crib of the Lil Engine’s code.
• mytheme.info.yml
• mytheme.libraries.yml
• css/admin-styles.css
Step 4 – Add the YAML files
Create the following in your “mytheme” directory:
config/install
add those 4 YAML files to the directory, so that the files should look like so

Step 5 (optional) – Make a new screenshot
I just copied the screenshot.png from Seven and added a name in front of it, using an image editor.
Then I save it as screenshot.png
Plus, I added the file path to the mytheme.info.yml file.
“screenshot: screenshot.png”
(Note: the “screenshot” key is necessary, but the file name can be whatever you want. I also changed it to logo.png in another iteration, to keep it distinct from Seven–just for my own sanity.)
This step of adding a customized screenshot is also described briefly in Lil Engine’s post.
Issues
If you need to make changes to the theme after setting it as the admin theme (especially if they relate the YAML files).
- Set “Seven” as the Administration
- Uninstall “My Theme”
- Make necessary changes to the theme (like adding files to the config/install folder [or changing said files])
- Install “My Theme”
- Set “My Theme” as Administration
- Clear cache (of course, right?)
Feedback
If you try to use this guide and run into trouble, let me know. I would love to improve it where improvement is necessary.
